
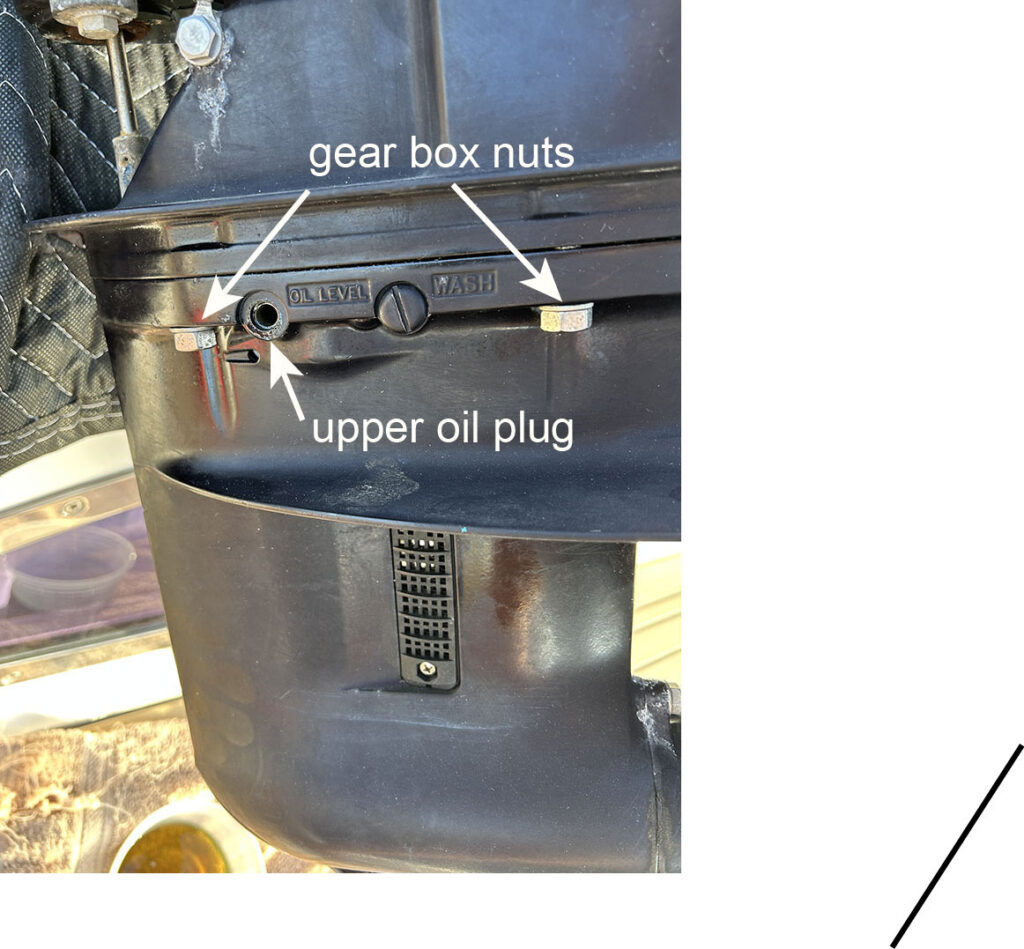
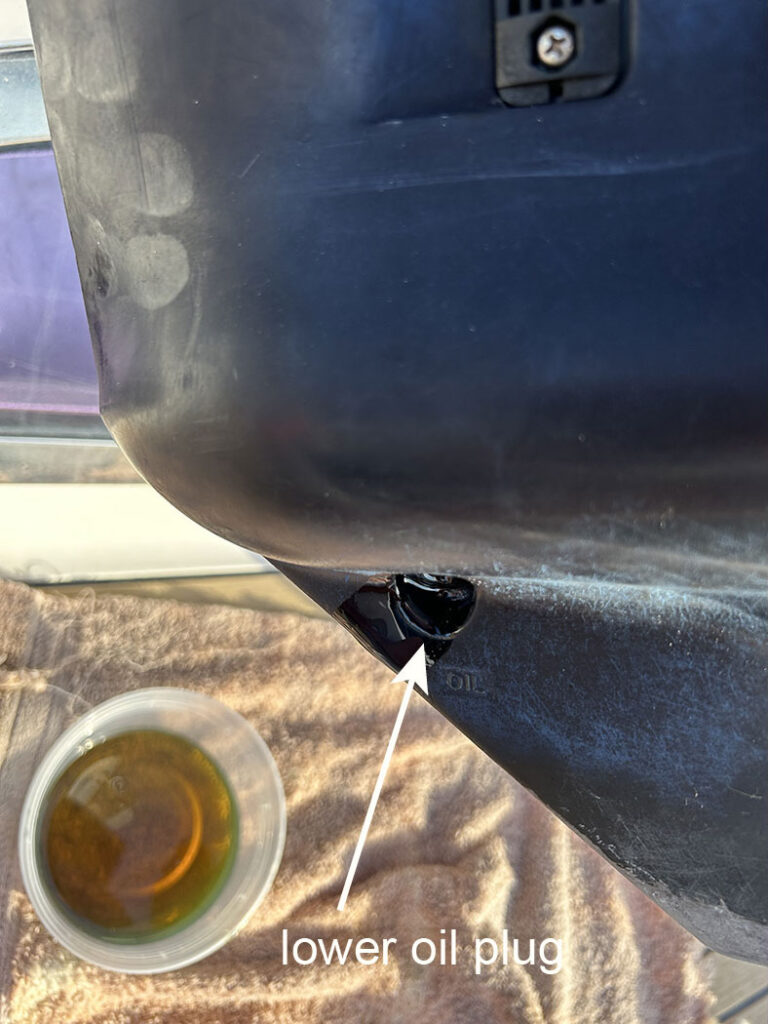
I was steering the dingy through the shallows along the coast of Culebra Island off the coast of Puerto Rico when the motor hit an unseen mud bank studded with stringy sea plants hidden just below the surface. I had four of my oldest daughter’s friends on board and was pointed into the sun so I didn’t see the trouble until the engine reared up, stuttered, then quit. Uh Oh. What happened was clear, so we pushed our way out with oars back into the deeper ridges. The outboard actually started again, but wouldn’t increase rpms much past idle and was running very rough. We limped back to Galini to assess the damage. I pulled the two-stroke Tohatsu 18hp outboard onto the mizzen deck, suspecting a shredded intake water pump impeller was to be found. First step was to remove the oil from the gear case. To do this, I needed to stand the motor upright, then remove both the upper and lower oil plugs (bolts). The upper plug needs to be removed because it holds a vacuum in the gear chamber when full of oil. The drained oil was captured in a plastic cup for disposal at the marina.
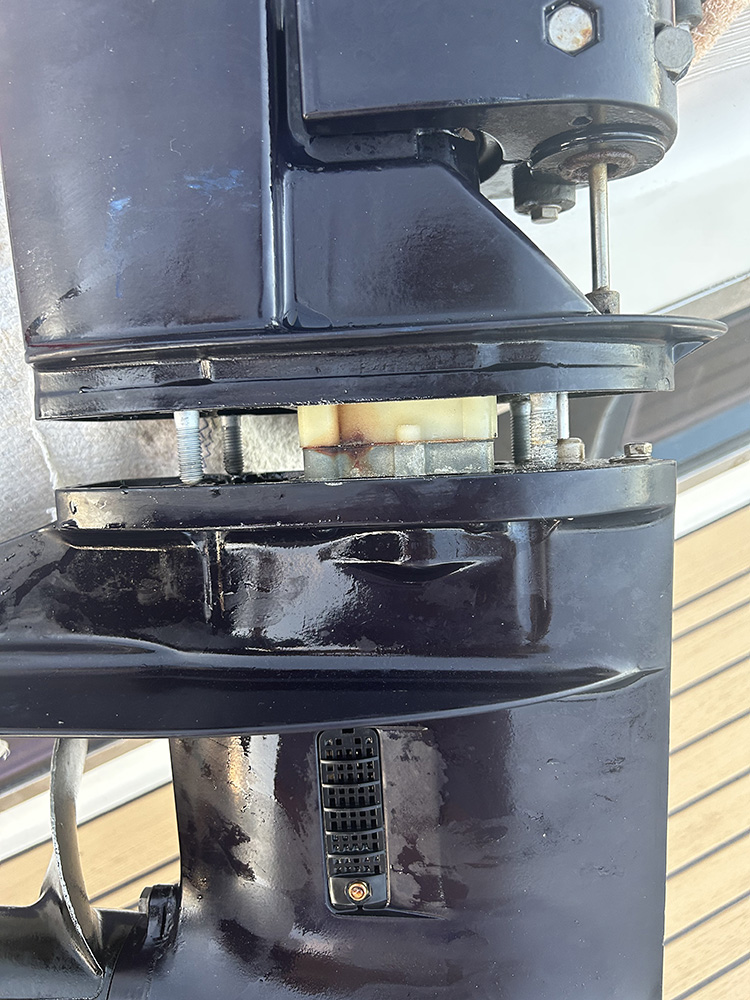
Next step was to remove the gear case assembly, also known as the lower unit. There are four studs that connect the upper and lower units. Four nuts (17mm) with washers were removed on the lower unit, that allowed the lower gear case assembly to be pulled away from the upper unit.
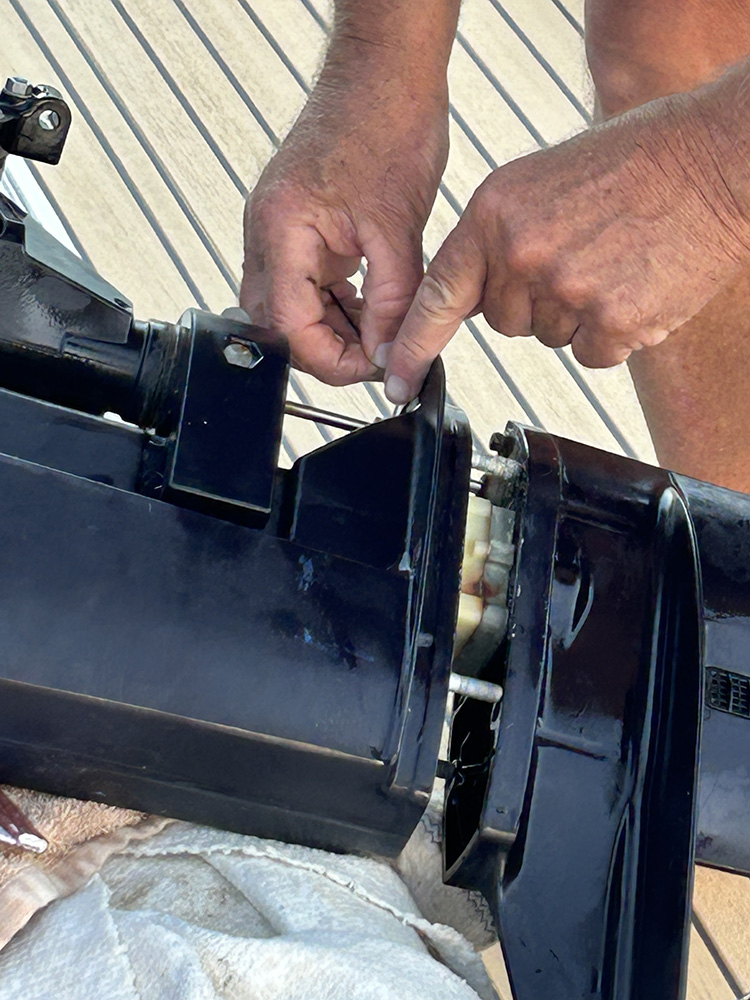
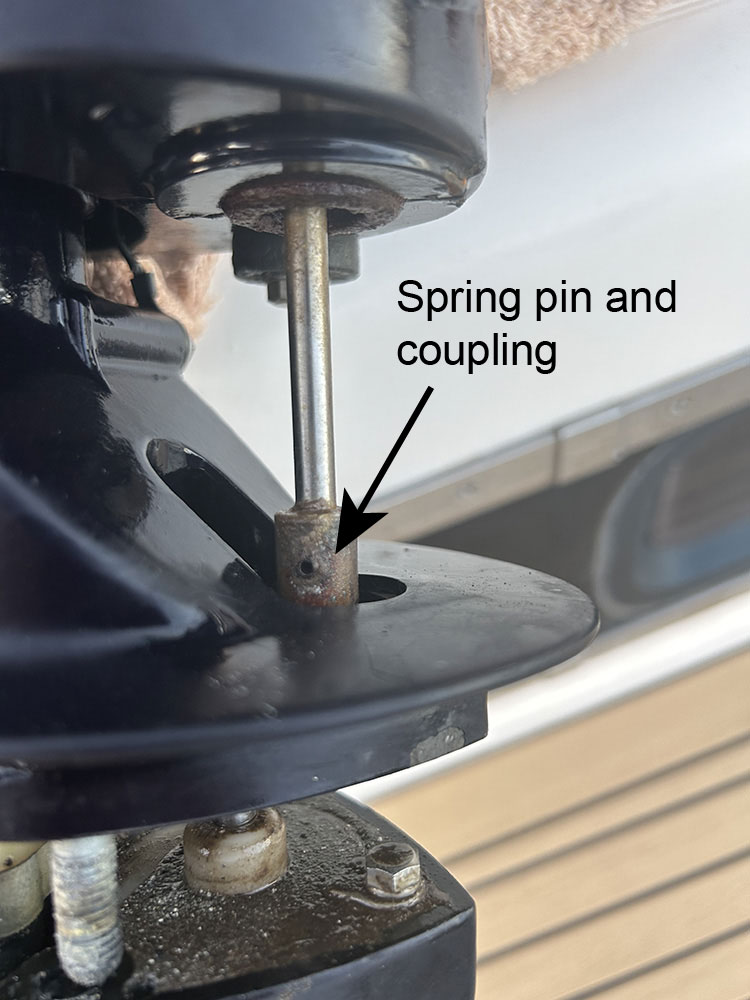
However, the gear case assembly can not be removed entirely until the cam rod is separated from the shift rod by removing a spring pin in the coupling that holds the two shafts together. One needs to use a 3 mm punch to push the spring pin out of the coupling. In my case, the spring pin was so corroded that I could not get it out without danger of bending the shafts.
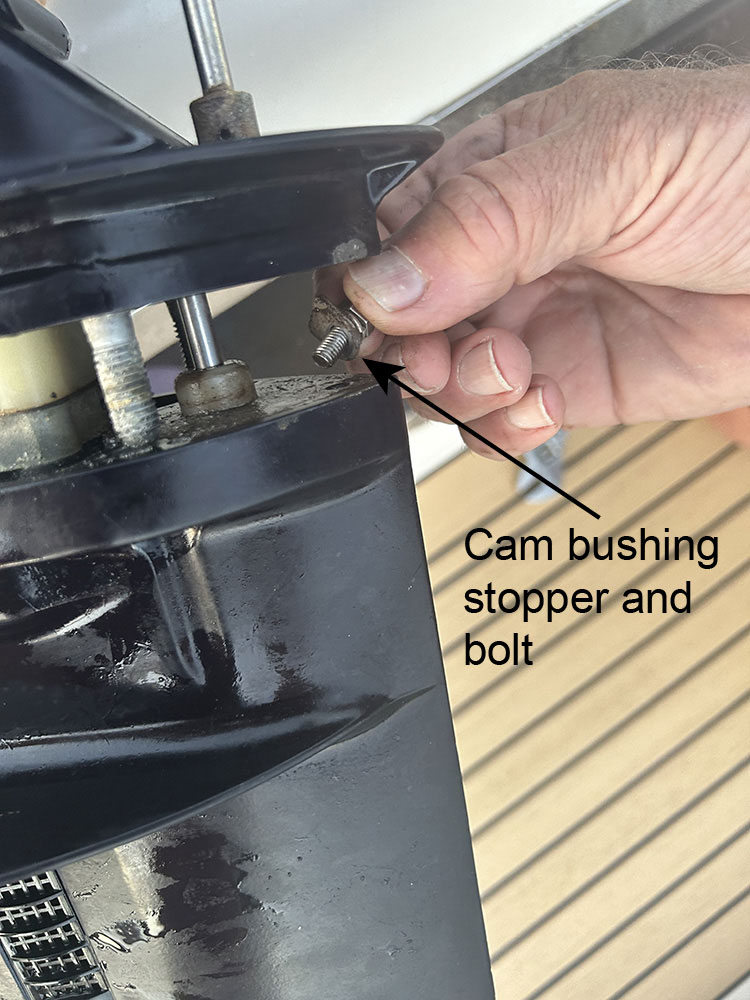
So, I instead decided to pull the cam rod out of the lower unit housing. I had to first remove the bolt, washer, and stopper metal shim that holds the plastic circular cam rod bushing in place.
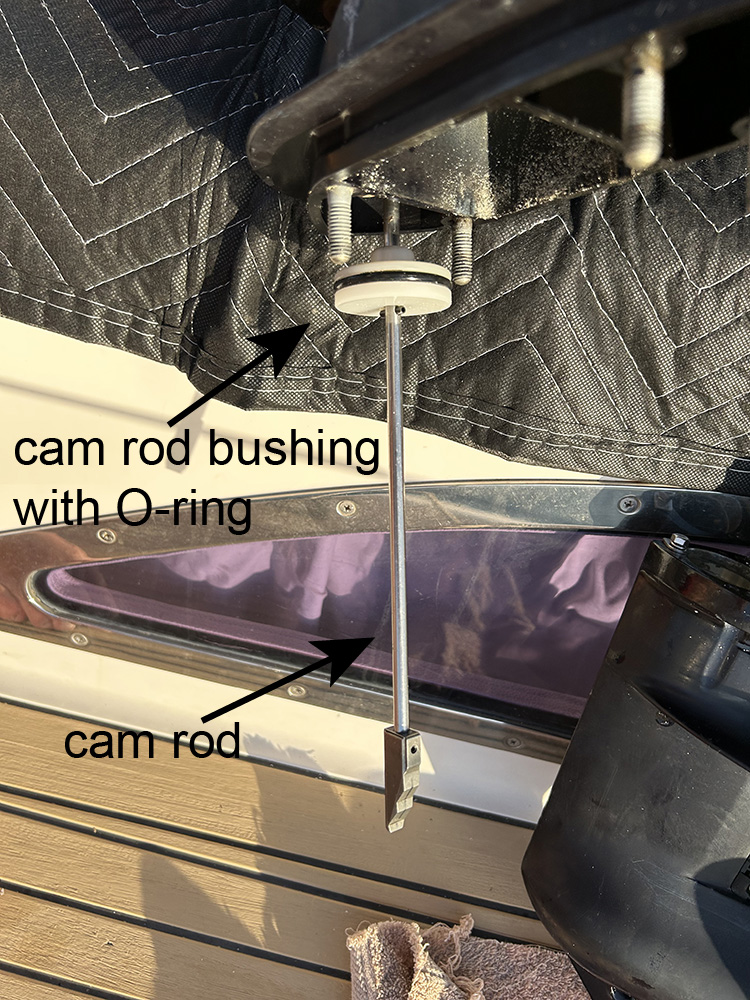
The cam shaft runs through the center of the cam rod bushing, which has an O-ring stretched around the circumference and seals the oil chamber of the gear housing. The bushing is held onto the cam rod by a set screw. I gently pulled, wiggled, and tapped the lower unit with a rubber mallet to get the O-ring and bushing to slide out of the gear chamber, allowing the cam rod to move with it. This allowed me to fully separate the gear case assembly from the upper motor unit.

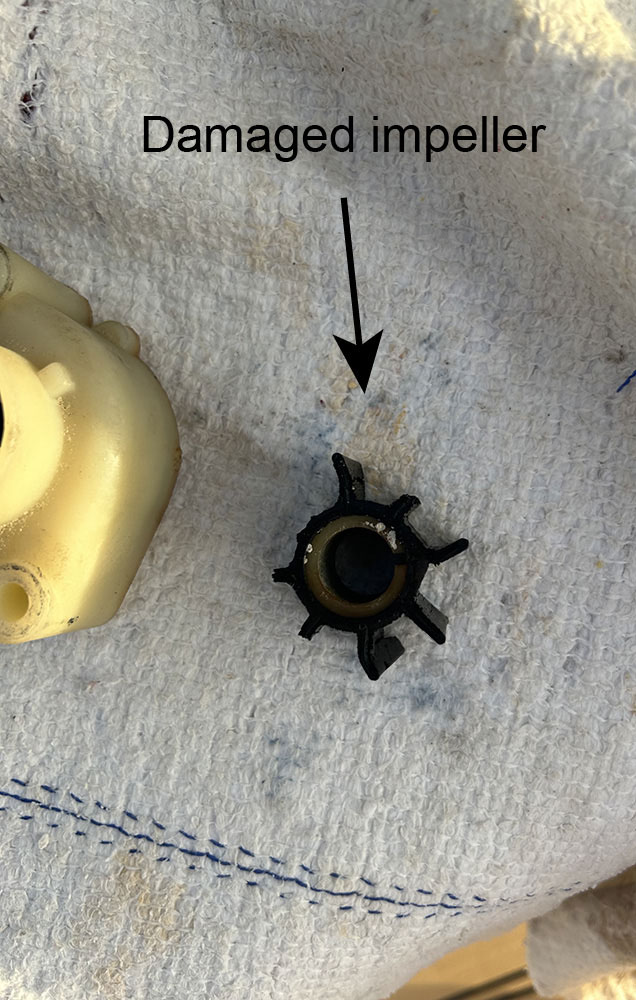
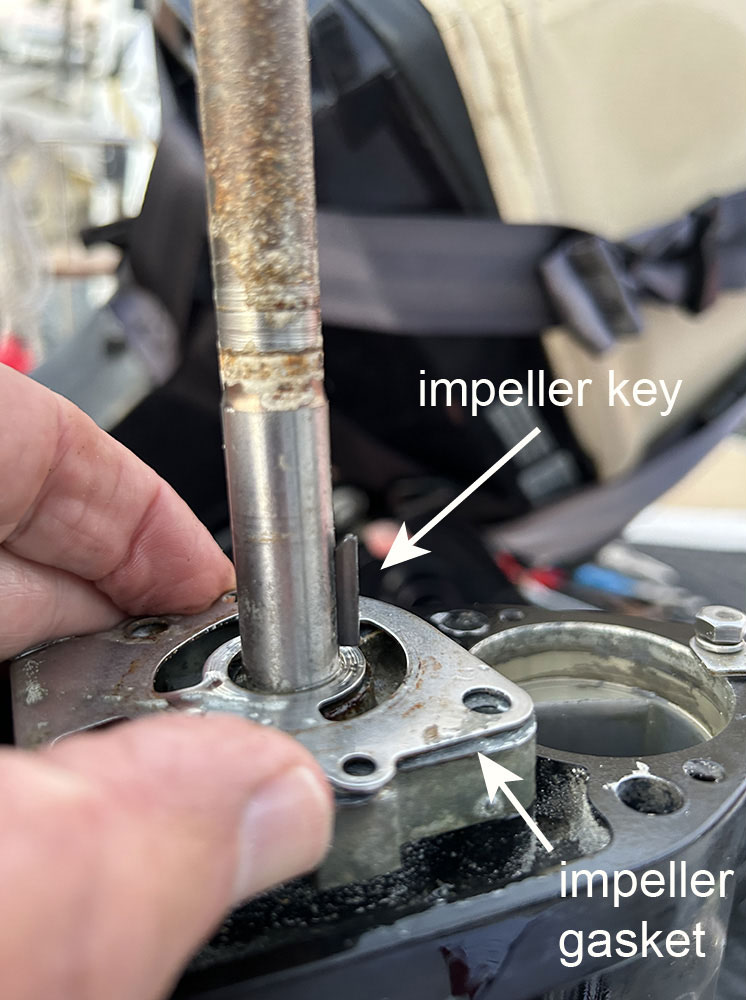
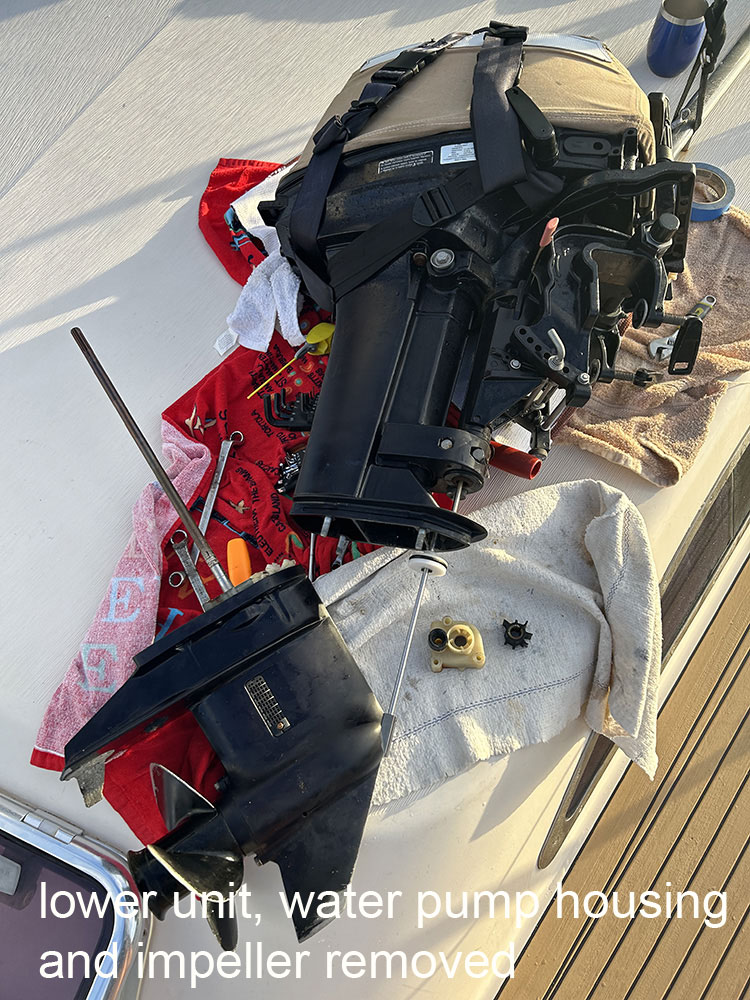
Next, one needs to remove the water pump housing, called the pump case. There are 3 13mm bolts that hold the case onto the gear assembly housing. Once these were removed, the pump case came off to reveal the impeller inside. It was immediately obvious that the impeller had been severely damaged due to the grounding. Mud, shell, bits of plants had been sucked up through the sea water intake shield and shredded the rubber fingers of the impeller. The impeller was removed by hand, pulling it upwards along the drive shaft. Now a note of caution. The impeller is held in place onto the drive shaft by an impeller key. The key is a moon-shaped small metal/nylon piece that dove tails into a groove etched into the drive shaft. The flat side of the key fits into a separate groove in the impeller. As the drive shaft spins, the impeller key holds the impeller fixed to the shaft and allows it to spin, thereby pumping water up through the cooling pipe.
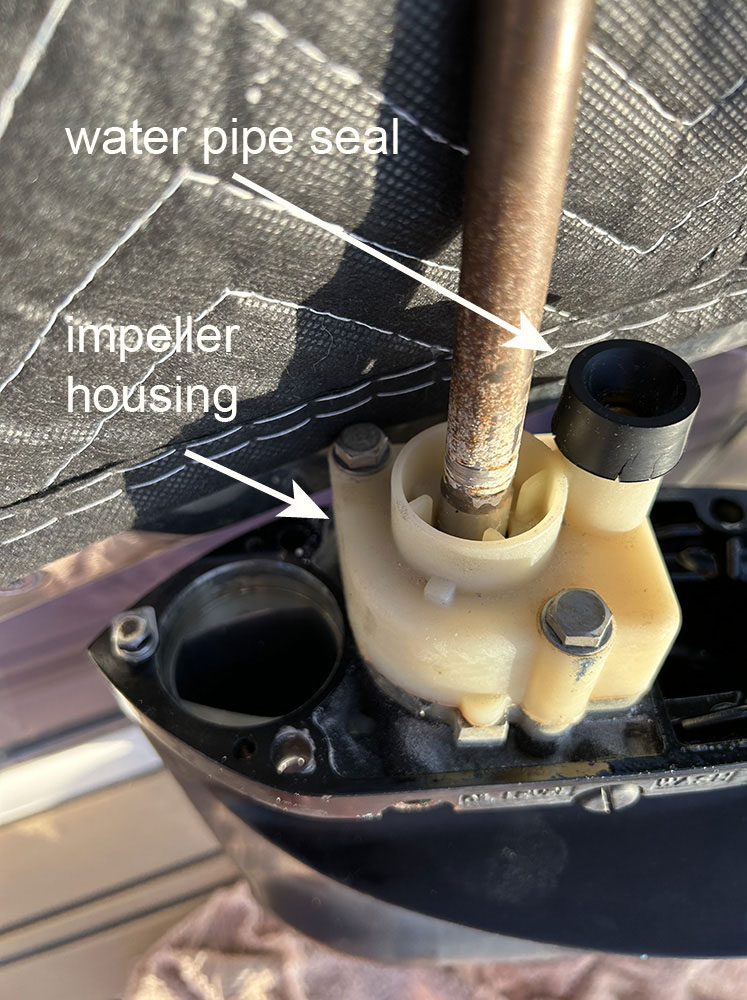
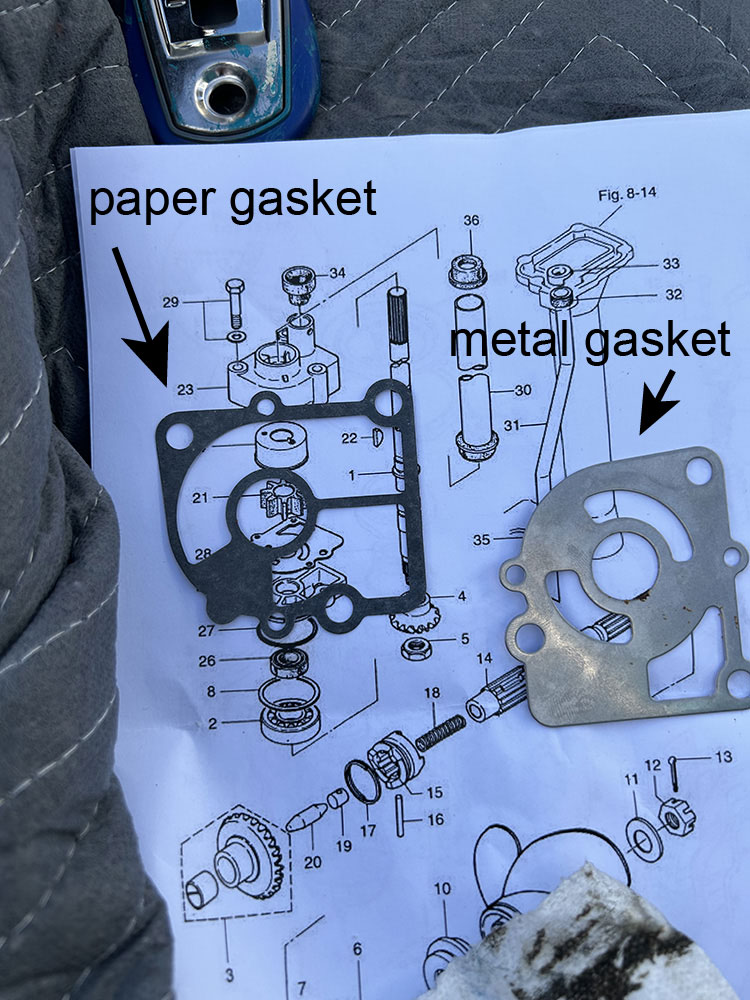
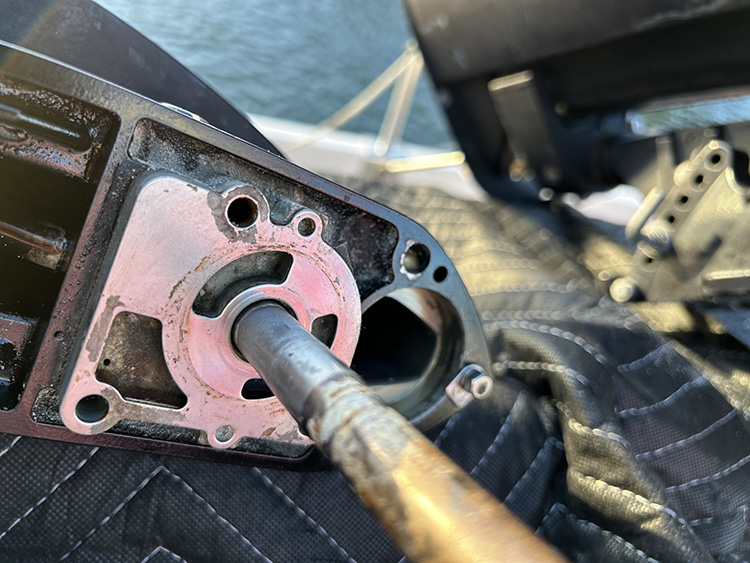
I purchased all of the components for the water pump. These included a pump case, impeller, impeller key, metal impeller pump case liner, metal gasket, fabric gasket, and water pipe seal. After removing the metal and paper gaskets, I cleaned the metal surface of the gear housing where the new gasket would go with a 400 grit wet sandpaper.
Reassembly of the pump and lower unit was merely a reversal of the previous steps. There were no torque specs for the nuts or bolts, so rule of thumb is ½ turn past hand wrench tight. Once the whole motor was assembled, it was time to stand it upright again and fill the gear chamber with new oil. I used Tohatsu Gear Oil 80W – 90. It comes with a convenient needle spout that fits into the oil plug hole. To fill the oil chamber, one squirts the oil up into the chamber from the bottom plug hole until it begins appear leaking out of the top plug hole. The top plug screw is then inserted followed by the bottom plug screw. In this case, it required ¾ of a quart of oil to fill the chamber. Next step was to place the outboard on the dingy and give it a try. Started first pull! It really did, to my surprise, and has been running smoothly since.